97 Best Free Education WordPress Themes of 2019
We’ve noticed a significant increase in searches for education themed (pun intended) WordPress themes in the last year. I’m not exactly sure why, but I can only guess many educators, teachers, schools, online courses and education bloggers are turning to WordPress as their preferred platform to build a website. Not surprisingly as it’s one of the easiest and most popular content management & blogging systems in the world.
Below we’ve compiled a list of the highest rated WordPress themes which can be used for an education website. Not all these themes are targeted specifically for education, some are multipurpose and can also be used for an education themed website. All these themes are free and can be found on the official WordPress.org directory and have received a minimum 80% rating from at least 3 users.
Academic

A clean, modern, engaging and responsive WordPress education theme ideal for educational institutions and agencies. Features including full width and boxed layout with slider, focused content, slick effects, posts/features/courses showcasing. It is loaded with theme options and provides several features to make user-friendly, interactive and visually stunning website with implementation of all features of latest WordPress like partial refresh and validation. It is compatible with top WordPress plugins such as JetPack and Contact Form 7. A special accent is made on its cross-browser compatibility, mobile friendly design and responsive features.
Advance Education

Advance Education is a fresh, engaging, visually appealing and elegant education WordPress theme for all classes from preschools and kindergartens to schools, colleges and universities. It suits all LMSs, training academies, online education portals, distance learning, coaching centres, mentors, online library, educational websites and everything related to education, learning and teaching. It offers various layout options to change the look and feel of the website from modern to bold and vice versa. This education WordPress theme is adaptable to changing screen size of mobiles, tabs and desktops. It is compatible with all the leading browsers and can be translated into 70+ different languages. It is readily customizable to change its various elements to make it represent your brand. To keep visitors engaged, there are several sections like gallery, testimonial, faculty, contact form etc. Advance Education is made to score good rank in search engine results and its social media icons give the needed exposure to reach maximum people in minimum time. It is based on the latest WordPress version and hence yields a bug-free website. Its interface is simple to understand so any person with no previous coding skills can also use it to design a high performing and professional looking website. Demo: https://www.themeshopy.com/advance-education-pro/
Attire

Attire is a fast, mobile responsive, highly customizable, SEO friendly multipurpose theme. It was built with the Gutenberg editor in mind and offers hundreds of customisation options which allows to make a website look exactly the way you intended. Create any type of website, such as business agency, shop, corporate, education, restaurant, blog, portfolio, landing page and so on. This theme allows to customise pages with google-fonts, page background, page header and sidebars. Try Demo: http://demo.wpattire.com. Attire is # WooCommerce Ready # Gutenberg Block Ready # RTL & Translation Ready # Also Compatible with all major page builders like elementor, divi, visual composer.
BB Mobile Application

Trying to create an interactive website with the help of a flexible option? If so, let us introduce a stunning solution! BB is a beautiful and responsive business WordPress theme. BB Mobile Application is a unique theme that can easily bring your website to perfection. Neat, dainty and extremely easy to use, this theme will truly make your website stand out. BB Mobile Application is a free WordPress theme for APP websites. BB App is an innovative and clean Lead Capture cum Landing Page WordPress Theme from Themeshopy. This theme is ideal for seeking reviews of upcoming products like mobile app, gadgets or any other business proposition, company corporate identity showcase, blog, one page, landing page, construction, travel, hotel, real estate, restaurant, photography, industrial, portfolio, gym, education, affiliate, job board and portal, jewelry, local business, creative agency, architecture, event, gallery, lifestyle, lens, listing, yoga, wedding, university, school, sports, quotes and similar websites. It is a highly suitable theme for APP post display. It has purpose oriented design, responsive layout and special features to manage Slider, service and footer from customize admin section. This user-friendly theme has secure and clean code due to which you can obtain faster page load time. It provides different personalization options making it effortless for you to customize the theme. So, get ready to create a professional website with this multipurpose theme which has optimized codes. Demo: https://www.themeshopy.com/bb-mobile-application-theme/
Be Page

Be Page is a Responsive Corporate One Page & Minimal Multipurpose WordPress Theme for Corporate, Portfolio, Personal, Agency, Business, Education, Restaurant, Wedding, Landing, Shop, Blog, Real estate, App landing, Travel or web agencies anything .It’s based on Bootstrap framework and HTML5/CSS3 technologies, with a minimal design, clean and elegant, fully responsive and customizable. Be page features full and seamless integration with Elementor Theme Builder – Free Drag and Drop page builder and Ultimate Addons. Quick and easy setup to create a portfolio and show your works and services. The Theme is optimized for smartphone and tablets, it provides a clear documentation and no coding knowledge is required. Check out Theme Support at https://edatastyle.com/dwqa-questions/ and Demo at https://eds.edatastyle.com/demo/be-page
beautiplus

BeautiPlus is a beautiful, responsive, colorful, stylish and free modern WordPress theme. BeautiPlus is an easy to use and highly intuitive multipurpose WordPress website theme. BeautiPlus has been designed with the main objective to provide website building platform for fashion and blogging website webmasters that are looking for professional quality and creativity. It is perfect for fashion, news blog, photography, wedding, fitness, health, gym, business, corporate, personal, construction, massage and spa, beauty saloon, bakery, cake shop, modeling, education, charity, glamour, music, blogging and any small business. Demo Link: https://gracethemes.com/demo/beautiplus/
Biznez Lite

Biznez Lite is a minimal, responsive and Elegant Business theme with easy Admin Options Panel. BizNez Lite is a modern and flexible business and portfolio theme which offers one click install and easy to use Admin Options Panel. Biznez Lite theme can easily be customized according to your needs. You can use own custom logo, logo alt text, custom favicon, add social links, rss feed icon, own copyright text etc. And all this can be easily managed from Biznez Lite Theme Options Panel. BizNez Lite supports widgetized areas, featured images and it is translation ready as well. You can use this to create any type of website be it a business website, a portfolio website, a nonprofit organization website, a landing page, an education website and so no.
Blocksy

Blocksy is a blazing fast and lightweight WordPress theme built with the latest web technologies. It was built with the Gutenberg editor in mind and has a lot of options that makes it extendable and customizable. You can easily create any type of website, such as business agency, shop, corporate, education, restaurant, blog, portfolio, landing page and so on. It works like a charm with popular WordPress page builders, including Elementor, Beaver Builder, Visual Composer and Brizy. Since it is responsive and adaptive, translation ready, SEO optimized and has WooCommerce built-in, you will experience an easy build and even an increase in conversions. Note: Blocksy is built withe the latest web technologies in order to bring you the smoothest experience, that told, old browsers like IE 11 and below may not work as expected. We strongly reccomend you to update/switch to a modern browser.
Blog Kit

Blog Kit is a free minimal blog theme compatible with Elementor page builder. This free blog theme is suitable for fashion, sports, personal, travel and all types of websites. Furthermore, being compatible with Elementor, Blog kit can be used for business, corporate, construction, agency, law firms, spa, fitness, medical, education, and all creative website development. Additionally, This minimalist WordPress blog theme is a speed optimized, simple and easy to use best free WordPress blog theme. Blog Kit is well optimized theme with 95% GTMetrix PageSpeed Score.
Blogger Era

Blogger Era is a responsive blogger template, it is clean and compatible with many devices, It’s perfect for creating your blog, no need to coding as it is very customizable.Blogger era is a clean,responsive,minimal and well-thought WordPress theme for professional bloggers, publishers, entrepreneurs, companies,news,blog,business,Lawyer,education,restaurants,cafe,portfolio etc..Blogger era is multiple theme with an eye-catching design.Here you can get a completely different appearance of your blog or magazine.
Blossom Coach

Blossom coach is a free WordPress coaching theme designed to create websites for coach, mentors, speakers and therapists. You can easily use this theme to create stunning website without any knowledge of coding. The theme is designed with features that highlights you and yours services that will help to improve your followings. The theme is also multi-purpose. So you can also use it to build small business (restaurants/cafe, travel, education, hotel, construction, events, wedding planners, fitness, affiliate, fashion, lawyer, consulting, sport/medical shops, spa/temas, political), portfolio, church, online agencies and firms, charity, ecommerce (WooCommerce), and freelancers websites. It is responsive, Schema.org compatible, SEO friendly, RTL compatible, speed optimized, and translation ready. Check theme details at https://blossomthemes.com/downloads/blossom-coach-free-wordpress-theme/, demo at https://demo.blossomthemes.com/blossom-coach/, read the documentation at https://docs.blossomthemes.com/docs/blossom-coach/, and get support at https://blossomthemes.com/support-ticket/.
BootFrame Core

BootFrame Core is multipurpose WordPress theme with a clean responsive design based on Bootstrap framework. BootFrame Core has a professional look that suits corporate business, blogs and portfolio websites. With deep WooCommerce plugin integration, BootFrame Core makes it easy to create eCommerce website. BootFrame is highly customizable with unlimited color and font options, logo upload, social media icons and much more that can be adjusted via Costomizer. You can easy build for your business site, portfolio, blog, one page, restaurant , healthcare, construction, education, sports, online agency, services or any other site. BootFrame supports Site Origin’s Page Builder which allows you to build any page layout required. It’s also integrated with popular plugins: Contact Form 7, WPML, Polylang, Shortcodes Ultimate, WooCommerce. Tested with Gutenberg and WordPress 5.0
Brigsby

Fast, Spacious, SEO friendly, Responsive theme for writers, local business, personal website blogging, church, state, college, university, travel, education and much more. Brigsby is a pixel perfect design theme with very flexible layout and numerous customization options. It is SEO friendly with featured image supports and custom colors. Fast loading and light weight theme with a clean white and minimal design. Compatible with all major plugins like Jetpack, WooCommerce, Contact Form 7, Google Maps Press, Page Builder etc. Theme support is available at https://wphoot.com/support/ You can also check out the theme instructions at https://wphoot.com/support/brigsby/ and demo at https://demo.wphoot.com/brigsby/ for a closer look.
Bstone

Bstone is fully customizable, fast, lightweight, responsive, RTL & translation ready and super flexible multipurpose theme built with SEO, speed, and usability in mind. Bstone comes with WooCommerce Shop Customizer that empowers you to choose the exact look of your e-commerce website. The theme works great with any of your favorite page builder likes Elementor, Beaver Builder, SiteOrigin, Thrive Architect, Divi, Visual Composer, etc. You can build any type of websites like shop, blog, business agencies, corporate, portfolio, education, university portal, consulting, church, restaurant, medical and so on. You can even edit the settings on tablet & mobile so your site looks good on every device. Bstone is compatible with all well-coded plugins, including major ones like OrbitFox, Yoast, BuddyPress, bbPress, etc. Learn more about the theme and ready to import demo sites at https://wpbstone.com/
Business Club

Business Club is a multipurpose elegant, clean and Elementor compatible WordPress theme with premium look, feel and features that can be used for not only business websites but also for other WordPress sites like educational institutes, personal portfolio, blogging, etc. Business Club is simplistic but very elegant and mesmerizing theme which has all the features that you need handcrafted into it. Even with all the dazzling features the theme is optimized with a standard coding, frequent maintenance and expert quality assurance so that you will never have to compromise quality and speed. Demo – https://axlethemes.com/theme-demo/?demo=business-club
Business Elite

Business Elite is a fully responsive, SEO-friendly WordPress business theme with clean design to promote your corporate identity and engage more clients. It’s a one page WordPress theme using page scroll and parallax technology to make the site more professional. Sticky menu will further lead to easier navigation. This WordPress business theme is compatible with most of the top WordPress plugins, including JetPack, Contact Form 7/ Form Maker, Photo Gallery, BuddyPress, bbPress, Woocommerce etc. It is multilingual ready (WPML) and child theme ready. To showcase your works or corporate images/offers you can use full width slider or use full screen lightbox slideshow. Do you have website visitors who use mobile devices? Business elite theme has cross-browser compatibility, plus mobile friendly and retina-ready and overall responsive appearance. The theme allows making layout changes using layout editor and front page builder. About 30 Google fonts are available in typography options. Since Business Elite has large number of customizable features, social sharing options and functionality enhancing possibilities, it can be used for various types of websites: commercial company and ecommerce websites, non-profit organizations, personal and portfolio websites and photography or serve as blog theme for such fields as restaurant industry, healthcare, construction, education, sports, services etc. Demo URL: http://themedemo.web-dorado.com/theme-businesselite/
Business One Page

Business One Page is a free one page WordPress theme to create business and corporate websites. It comes with one click demo import feature. The design is responsive and shows very well in mobile and tablet devices. The theme is SEO friendly and make it easy to find on Google and other search engines. It is loaded with theme options and provides several features to make user-friendly, interactive and visually stunning website. Such features include advance slider options, portfolio and product showcase, team member, our services showcase, 2 clear Call to Action (CTA) buttons, testimonials, social media, contact details with contact form. It also includes 3 custom widgets for recent posts, popular posts and social media. The theme is also translation and woocommece (online shop) ready. Designed with visitor engagement in mind, Business One Page allows anyone to create a beautiful, fast and mobile friendly website compatible with all browsers and devices. Though this theme is created to make business websites, you can use to make all kinds of websites such as web agency, portfolio, e-commerce, photography, construction, restaurant, video, real state, travel, wedding, education, hotel, church, event, music, review, fitness, affiliate, lawyer, community, sports, medical, cafe, spa, teams, band, food, hair salon, jewelry, political, football, school, university, bed and breakfast, pub, resort, squeeze page, reservation and winery websites. You can get free support in https://rarathemes.com/support-forum/, Documentation: https://docs.rarathemes.com/docs/business-one-page/ and check the demo at https://demo.rarathemes.com/business-one-page/.
Business Press

Business Press is a MultiPurpose, Modern, More than Responsive, Fast to load, SEO friendly and Fully Customizable WordPres Theme. Business Press theme used latest version of bootstrap for responsive layout and fully compatible with all types of mobile and tablet devices as well as desktop browser. Business Press theme will boost ranking of your website in search engines because it follows latest Google Web Master Guidelines and structured data implemented according schema.org project. and one of the modern feature is pixel perfect sticky header. All theme options are in customize so you will see changes happen on your website in real time as you make them. it is fully compatible with all popular page builders so you can display your contains anywhere on any page. it also have multiple page templates such as right sidebar, full width, landing page. so you can create unlimited modern pages and landing pages using page builder. This theme is fully compatible with woocommerce plugin so it can be use for online selling business. Overall it can be used for various types of business websites such as blog, one page, landing page, construction, travel, hotel, real estate, restaurant, photography, industrial, portfolio, woocommerce, gym, education, affiliate, job board and portal, jewelry, local business, creative agency, ecommerce, architecture, event, gallery, lifestyle, lens, listing, yoga, wedding, university, school, sports, quotes and similar websites.
Businessweb Plus

Businessweb Plus is a clean and retina ready free business WordPress theme. This theme matches the changing dynamics of startup business and it beautifully incorporates the ultra modern needs of any business website. Businessweb Plus free WordPress theme is suitable for both corporate and creative businesses. It is a professional multipurpose theme designed for creative agency, corporate business, personal blog, photography, construction, fashion, consulting company, education, news, modeling, yoga, travel, adventure, hotel, gym, medical, healthcare, food, restaurants and any other business websites. Demo Link: https://gracethemes.com/demo/business-web/
Clean Education

Clean Education, the free Education WordPress theme portrays your education website as simple, clean and user-friendly. In the first visit, it makes sure that your visitors are provided easy access to any area they like. The layout is responsive and your website looks good through any device. The Education WordPress theme has powerful theme customization options. With dedicated separate sections for courses, professors, recent news, events and testimonials, you can display your best features to your visitors. The comprehensive design makes sure your website gains healthy exposure. The features in Clean Education Theme enable you to display your most impressive content on the forefront of the website. Because first impressions always matter. Clean Education Theme gives you the perfect online niche that is dynamic, multifunctional and upfront. This theme is translation ready. Check out Theme Instructions at https://catchthemes.com/theme-instructions/clean-education/, Support at https://catchthemes.com/support/ and Demo at https://catchthemes.com/demo/clean-education/
Construction Kit

Construction Kit is a free WordPress theme suitable for the construction company website. This construction template is compatible with Gutenberg, Elementor, and WooCommerce. Additionally, it works perfectly with Beaver Builder, Brizy, KingComposer and other page builders. Construction Kit theme is specially designed for construction business/companies, but it can also be used for any other business, corporate, lawyers, agencies, education, architecture firm, moves, furniture companies and many more. The construction kit is SEO optimized, mobile friendly and e-commerce ready construction theme.
Construction Landing Page

Construction Landing Page is a free WordPress theme for construction company. It is a WordPress theme with a contact form on the homepage, and includes several Call-to-Action sections to create high converting landing pages for construction and building business websites. Construction Landing Page is clean, responsive (mobile-friendly), speed optimized, and SEO friendly. It includes an attractive banner with a contact form, Services section, Portfolio section, Client Section, testimonial section, Banner with Call to Action Button (CTA), and social media. It is WooCommerce (online shop) compatible and translation ready. Though this theme is created to make construction companies websites, you can use to make all kinds of websites such as web agency, portfolio, e-commerce, photography, business, corporate, restaurant, video, real estate, travel, wedding, education, parallax business portfolio, hotel, church, event, music, review, fitness, affiliate, lawyer, community, sports, medical, cafe, spa, teams, band, food, hair salon, jewelry, political, football, school, university, bed and breakfast, pub, resort, squeeze page, reservation and winery websites. Check the demo at https://demo.rarathemes.com/construction-landing-page/, documentation at https://docs.rarathemes.com/docs/construction-landing-page/, and get support at https://rarathemes.com/support-ticket/.
construction-realestate

The exclusive Construction Realestate WordPress Theme offers you instant answers for your online activities that are related to your building industry. This is an ideal solution for real estate agents, real estate brokers, builders, woodworkers, contractors, inventors, interior designers, architects, plumbers, painters, or anybody who is interested in building construction business websites. Though it mainly occupies the construction area, it can be used for multiple businesses such as education, news, corporate, blog, photography, food, personal, holiday, portfolio, entertainment, repair, renovation, roofing business, construction landing page, etc. This theme has been crafted carefully keeping in mind the latest web design standards. It offers a dynamic customizer with multiple theme options, to bring out the design of your website as per your wants. This minimal WordPress theme is built on Bootstrap that makes it highly responsive and cross-browser compatible. Being a mobile-friendly theme, it gives a cutting-edge performance on every screen size. It has secure and clean codes that are in accordance with WordPress web standards. To match the style of your business, it offers eye-catching buttons, beautiful images, sliders, banners, contact form, and a lot more under the hood. With social media integration, it powers your online presence. Its SEO friendly nature will make your website reach the top search results. Take advantage of ample of features, functionalities, and an advanced set of customization options to create your own professional real estate business site. Reap the benefits of this free, flexible, and robust WordPress theme now! View full demo here: https://www.buywptemplates.com/construction-realestate-wordpress-theme/
Corpbiz

Corpbiz Theme is very powerful yet easy to use and customize. This theme is a creative responsive WordPress theme for many purposes. Already thousands of users loving this theme because it is designed for multiple businesses like startup, agency, freelance, blog, startup, portfolio, education, corporate and any kind of business. The theme is developed using Bootstrap 3 CSS framework that makes it friendly for all the devices like mobiles, tablets, laptops etc. In Corpbiz Lite, you can easily set Featured Banner / Slide, Site Info Content, Service, Portfolio, Latest News and 3 column widgetized footer. You will get various page templates like Homepage, Full Width Page and Blog Left Sidebar template. In the premium version, you will get Caption Slider, Site Info, Services, Project Slider, Portfolio’s, Clients / Sponsor, Theme Support Section, Latest News, Footer Callout and 3 Columns Footer. You will find various page templates like About, Service, Portfolio, Contact, Blog and Well styled Core Gallery. The theme has support for various plugin like WPML, Polylang and JetPack Gallery Extensions. Just navigate to Appearance / Customize to start customizing. Check premium version theme demo at https://webriti.com/demo/wp/corpbiz
Corporate Education

Corporate Education is an educational theme developed by Theme Palace. It is a multipurpose WordPress Educational Theme suitable for school, college, university and other educational consultancy. It’s eye appealing design and highly dynamic features uplifts your organization’s reputation. It comes with multiple layouts to support your organization’s branding. It comes with a wide variety of options so you can modify Layout, Styling, Featured Slider, Menus, Breadcrumb, Widgets and much more, directly from theme customizer. Corporate Education can be adapted to any kind of industry – not only educational but also in any kind of academy. This theme is WooCommerce compatible, translation ready and major browsers supportive.
cryptocurrency-exchange

Cryptocurrency Exchange is a beautifully designed WordPress theme with clean typography. Plenty of white space and clean typography of the theme makes it easy for readers to focus on the content. It can be used with all types of cryptocurrency related website like ico, exchanges, hardware, crypto news etc. Theme is fully customizable so it can be also used with other type of websites like e-commerce, corporate, agency, consulting, travel, business and blogging, cafe, spa, beauty salon, charity, yoga, wedding, dentist, education etc. The theme is responsive for all kind of devices, and also translation ready. Cryptocurrency theme supports most free and premium WordPress plugins like WooCommerce, Elementor, Shortcodes Ultimate, Jetpack, Contact Form 7, Yoast SEO and many more. You see more details using Theme Homepage link.
CryptoStore

CryptoStore is a beautifully designed well coded WordPress theme for starting an online shop or store using WooCommerce plugin. Plenty of white space and clean typography of the theme makes it easy for readers to focus on the content. It can be used with all types of cryptocurrency related shop or store website like ico, exchanges, hardware, crypto news etc. Theme is fully customizable so it can be also used with other type of websites like e-commerce, corporate, agency, consulting, travel, business and blogging, cafe, spa, beauty salon, charity, yoga, wedding, dentist, education etc. The theme is fully responsive for all kind of devices, and also translation ready. Cryptostore theme supports most free and premium WordPress plugins like WooCommerce, Elementor, Shortcodes Ultimate, Jetpack, Contact Form 7, Yoast SEO and many more. You see more details using Theme Homepage link.
Customify

Customify is fast, lightweight, responsive and super flexible multipurpose theme built with SEO, speed, and usability in mind. Unleash the power of your imagination with a true WYSIWYG Header & Footer builder (inside the WordPress Customizer) built exclusively for this theme. The theme works great with any of your favorite page builder likes Elementor, Beaver Builder, SiteOrigin, Thrive Architect, Divi, Visual Composer, etc. Combined with the Header & Footer builder, you can build any type of websites like shop, business agencies, corporate, portfolio, education, university portal, consulting, church, restaurant, medical and so on. Customify is compatible with all well-coded plugins, including major ones like WooCommerce, OrbitFox, Yoast, BuddyPress, bbPress, etc. Learn more about the theme and ready to import demo sites at https://pressmaximum.com/customify
Di Blog

Di Blog is a Clean, Modern, Responsive, SEO Friendly, Customizable and Powerful WordPress Theme for Creatives and Bloggers. Features: One Click Demo Import, Front Page Slider, Typography Options, Social Profile and Icons, Three Level Responsive Main Menu, Sticky Main Menu, Sidebar Menu, Custom Logo, Page Layouts (Full Width, Left Sidebar, Right Sidebar), Advance Footer Widgets with Layout Selection, Footer Copyright Section, Fully Compatible with popular plugin like Page Builder, WooCommerce, Contact Form 7, WordPress SEO etc. it is a multipurpose theme and can be use for many type of websites such as personal, blog, portfolio, photography, apps page, fitness, law firm, travel, tourism, vacation, moving service, consult, hotel, restaurant, creative business, wedding planner, sport, medical, startup, corporate website, online selling, one page, landing page, construction, real estate, industrial, gym, education, affiliate, job board and portal, jewelry, local business, agency and firm, e-commerce ( WooCommerce ), architecture, event, gallery, lifestyle, lens, listing, yoga, university, school, quotes etc. Di Blog theme is fully compatible with all popular page builder plugins like Elementor Page builder, Page Builder by SiteOrigin, Visual Composer Page Builder and also have page builder templates. DEMO: http://demo.dithemes.com/di-blog/
Di Business

Di Business theme is a multipurpose, & SEO-friendly WordPress theme with advanced design options. It is a fully compatible & responsive WordPress theme with all popular page builder plugins and WooCommerce plugin. so, it can be used to display business information and e-commerce websites. This WordPress theme is specially designed for professionals businesses, commercial companies, and eCommerce websites. Also, it can be used for non-profit organizations, personal and portfolio websites and photography or serve as a business theme for such fields: the restaurant industry, construction, education, health care, sports, services, etc. It is a clean, responsive, multilingual ready and child theme ready. Make your website device-friendly with cross-platform compatibility, ultra mobile friendly and 100% retina-ready theme. Besides, your website will look & work great on a desktop (or laptop), a tablet, and a mobile device browser. Check out some top features: here you can import the theme in one click, select footer & WooCommerce layouts & further customize them, custom color options, Advanced WooCommerce settings, Full Width for Page Builder, Landing Page Template, Contact Form 7 Ready, Page builder Ready. Di Business is a Fully Customizable theme where users can Add Social Icons + lots more! See more at https://dithemes.com/di-business-free-wordpress-theme/
Draco

Draco is a modern, fast, lightweight, SEO optimized and responsive multipurpose WordPress theme. Ideal for Business websites, Landing pages, E-commerces, Portfolios, Photography and Creative sites, One Pagers… and more. The theme is quick and easy to install, RTL and translation ready and works great with any of your favorite page builder likes Elementor, Beaver Builder, Thrive Architect, SiteOrigin, Visual Composer, Divi, etc. With Draco you can build any type of websites like shop, corporate, portfolio, business agencies, education, university portal, consulting, church, restaurant, medical and so on. Demo/Manual: https://www.webpsilon.com/themes/draco/
Edu Care

Edu Care is an attractive, modern, easy to use and responsive WordPress education theme with stunning design and flexibility. This theme is capable of tackling the overall needs of all educational institute websites including universities, colleges, schools and others. This theme is user-friendly and best suits the latest version of WordPress. With the help of this theme, you can produce an informative, appealing and at the same time engaging education websites. Edu Care Theme is cross browser compatible performing well with any browser. Also, for non-coders it is very easy to use because of it’s secure and clean code. This translation ready theme has an ultimate design with best options that makes it beautiful and unique from others. This theme will help you to create very high quality educational website easily with no time at all.Theme instruction at https://themepalace.com/instructions/themes/edu-care/. Video Instruction https://www.youtube.com/watch?v=tOHMCc3Yesk&list=PLqhjiGVup1_KXv6DCfum_xVgSgy4vPuK3
Education Base

Education Base is an attractive, modern, easy to use and responsive WordPress education theme with colourful design and stunning flexibility. This theme is capable of tackling the overall needs of all educational institute websites including universities, colleges, schools and others. Education Base can be also used for business and corporate websites or one-page sites. The advanced theme options and available various widgets with drag and drop features will help to customize your site as you need. Some of the available options are awesome slider section, header options, footer options, layout design options, advanced colour options, widget options, custom copyright options, integrated social icons, notice bar options and lots of other available options will allow you to create unique website as you want. This theme will help you to create a very high-quality educational website easily with no time at all. Support Forum: http://www.acmethemes.com/supports/, Docs: http://www.doc.acmethemes.com/education-base/, Demo: http://www.demo.acmethemes.com/education-base/
Education Care

Education Care is free, full responsive, clean, modern looking and professional WordPress theme. This theme is best for kindergarten, school, university, college, academic institutions, training centers, coaches, LMS and other educational websites. It is not bound to educational websites as it is multipurpose theme. It can be used for any general, minimal, multipurpose, business, corporate, portfolio, digital agency, landing page, product showcase and all informative websites. Education care comes with inbuilt features like customizer to change all settings of website, widget section which can be managed by drag and drop, gallery, call to action, feature highlights, stat counter, featured courses and more. Speed optimization, security, dedicated support forum and well documentation are major features of this theme. Education Care aims to provide you best and unique website with minimal technical knowledge.
Education Hub

Education Hub is a clean and elegant WordPress education theme with simplistic but unique look and feel. This theme is best suited for college, school, university and other educational websites. But this theme is not binded to be fit for educational websites only. This is also flexible enough to be used for business and corporate websites. Theme is highly customizable with layout settings and several other theme options which can be customized by using Theme Options panel based on powerful Customizer API. Education Hub helps you to easily and intuitively create professional and appealing educational websites. Official Support Forum: https://themepalace.com/support-forum/ Full Demo: https://wenthemes.com/theme-demos/?demo=education-hub
Education LMS

Education LMS is a simple, clean, responsive and user-friendly education WordPress theme specially designed for university, school, college or other educational institutions. The Education LMS theme has powerful theme customization options such as custom header media, logo, custom menu, social icons, featured slider, courses, title bar, news, and more. It makes your website more engaging and informative. Especially, the Education LMS theme works excellent with Elementor and LearnPress plugins, help you easily create flexible content and sell the course online. For more details, check out Theme Instructions at http://docs.filathemes.com/education-lms/ and demo at https://www.filathemes.com/downloads/education-lms/
Education Master

Education Master, an Education theme by ThemeEgg, is a responsive WordPress theme for university, school, college or other educational institutions. Along with educational institutions, Education Master is flexible and loaded with several features to also cater to the needs of design agencies, corporate websites and small businesses. Official Support Forum: https://themeegg.com/support-forum/, Demo: https://demo.themeegg.com/themes/education-master
Education Method

Education Method is a clean and minimalist free WordPress theme. Mainly, it is developed for an educational field like schools, colleges, universities, institutes etc. But can be useful for other purposes also. The layout of the theme has been well-organized and designed with supreme quality. With the unique set of widgets available in the theme, users can play with them and design it beautifully. Different kind of sections available such as Team Widget, Course Section, Testimonial Section where you can explore the information about your services in a professional manner.
Education Mind

Education Mind is a convenient and intuitive education WordPress theme compatible with Elementor page builder. It is a pliable platform for creating all sorts of websites but specially focused for educational websites. While this theme is ideal for educational institutions it is flexible enough to be used for corporations, professionals, creative digital agencies and portfolio websites. It is completely responsive and works on all devices and screens. Theme is capable of displaying relevant information in a user-friendly manner. It uses a clean code and HTML5 and CSS3 files for a great performance with appealing looks.
Education Minimal

Education Minimal is a clean and minimalist free WordPress theme. Mainly,it is developed for an educational field like schools, colleges, universities, institutes etc. But can be useful for other purposes also.This theme gives you awesome looking website just put you contents and its ready to go and more features. Free Version Demo :https://rigorousthemes.com/demos-education-minimal/.
Education One

Education One Theme is a simple, clean, beautifully designed responsive WordPress Education One Page Theme. It is minimal but mostly used features will help you setup your website easily and quickly. Full width layout, featured slider,services/features layout, blog layout, social media integration, full width page layout and woocommerce ready. Fully responsive, cross-browser compatible, SEO friendly, education-one Theme is multi-purpose and is suitable for any type of business. Highest level of compatibility with mostly used WP plugins. Great customer support via online chat, email, support forum. Official support forum: http://oceanwebthemes.com/support/ View full demo here: http://oceanwebthemes.com/preview?theme=education-one
Education X

Education X is a simple and easy to use, modern and creative, user friendly, responsive WordPress theme. Education X WordPress Theme is a versatile theme, and includes Education Connect that enhance its functionality. Use it to showcase the pictures of your teachers, students, school events, etc. With one click demo content installer tool, you can have your new website up and running in a matter of minutes. Try it for your school/Educational website and see for yourself! SEO Friendly and fast loading theme check our Demo URL: https://demo.thememattic.com/education-x/
Education Xpert

Education Xpert simple clean and awesome fully customizable responsive Free Education WordPress Themes, Education Xpert specially design for all type of educational institutions websites. Education Xpert is one of the most accessible Free Education WordPress Themes which can easily accommodate all type of users with no coding skills to advanced or normal web developers. Education Xpert Free Education WordPress Themes includes excellent features for educational website and practices of all type of educational business, themes have included more advanced features like one-click demo data import, primary theme color, list courses section, about section, call to action, services list section display team member, success store counter, testimonial section, blog section and footer section with more individual page & post layout options, fully customizer based theme options. Education Xpert is very easy to use for all types of educational institutions website like online courses, colleges, universities, schools, and different other education-based websites. also, Education Xpert Free Education WordPress Themes is fully translation ready, a powerful options panel, child theme support, quality code, reorder all sections, site speed optimized, responsive, cross-browser compatible, good documentation, SEO friendly and supports WooCommerce and some other external plugins like element page builder, Page Builder by SiteOrigin, Jetpack, Contact Form 7 and many more plugins. If you face any problem or issue related to our education theme, you can refer to our theme documentation or contact our friendly support team. Check demo at http://demo.sparklewpthemes.com/educationxpert and theme details at https://sparklewpthemes.com/wordpress-themes/educationxpert and get free support forum at https://sparklewpthemes.com/support/
Education Zone

Education Zone is a free clean, beautiful and professional looking WordPress Theme specially designed for Education Institutions. This theme is best suited for college, school, university, LMS, Training Center, Academy, Primary School, High school and Kindergarten and other educational websites. The theme is very flexible and versatile can be used to build various types of business and corporate websites. The theme is highly customizable with various features and personalization options. Education Zone comes with several features to make a user-friendly, interactive and visually stunning website. Such features include custom menu, attractive banner, Stat counter, Courses section, testimonial section, Banner with Call to Action Button (CTA), and social media. The theme is SEO friendly with optimized codes, which make it easy for your site to rank on Google and other search engines. The theme is rigorously tested and optimized for speed and faster page load time and has a secure and clean code. The theme is also translation ready. Designed with visitor engagement in mind, Education Zone helps you to easily and intuitively create professional and appealing websites. If your school, college or university needs an online home that is dynamic and multi-functional, this theme is a good place to start. Check the demo at https://demo.rarathemes.com/education-zone/, documentation at https://docs.rarathemes.com/docs/education-zone/, and get support at https://rarathemes.com/support-ticket/.
Educenter

Educenter is an ideal Education Free WordPress Theme. It’s a simple, clean, elegant, user-friendly, impressive, engaging, and dynamic theme. Also, it is fully customizable, and responsive WordPress Theme as well. This education Free WordPress Theme is specially designed for the type of education business website. It is very easy to use for all types of educational institutions like online courses, colleges, universities, schools, and different other education-based websites. The theme showcases your website within a satisfactory viable way ranging from handheld smartphones, iPhones, tablets, Laptops to large screens too. This theme allows you to create a very high-quality and perfect instructional website effortlessly and easily in a short time. Educenter Free WordPress Theme has several advanced features and layouts settings too. It provides some custom settings like ( header layouts, 1 click demo import, call to action, the list features courses, team member, testimonial, dynamic color options and many more. It is also compatible with different page builder plugins. All the smart, useful and time-saving features help in carving a clan and latest website which easily in really lesser time. Besides, Educenter Education Free WordPress theme is fully responsive, cross-browser compatible, translation ready, SEO friendly theme. It is integrated with WooCommerce. The theme is even compatible with some other external plugins like elementor page builder, Page Builder by SiteOrigin, Jetpack, Contact Form 7 and many other plugins as well. If you face any problem related to our theme, you can refer to our theme documentation or contact our friendly support team. Check demo at http://demo.sparklewpthemes.com/educenter and theme details at https://sparklewpthemes.com/wordpress-themes/educenter and get free support forum at https://sparklewpthemes.com/support/
Edulab

Edulab is a free clean, beautiful and professional looking WordPress Theme specially designed for Education Institutions like school, colleges.
EduMag

EduMag theme is a modern magazine styled educational purpose responsive WordPress theme. It is easily customizable built using theme options based on customizer API with live preview. It is the preferred theme for numerous educational professional and magazine websites, such as those of educational academies like university, college, schools and specialized learning centers. It is flexible enough to use it for general purposes also. It provides numerous features like breadcrumbs, pagination, layout and sidebar controls, social media widget etc. It is WooCommerce compatible and translation ready theme.
EduPress

EduPress is a modern theme with a two-column layout. It is most suitable for education, business, corporate and non-profit websites. The front page displays a tabbed slideshow with 2-4 featured pages, and can work with your latest posts or a static page instead.
Elead

Elead is an education based theme developed by Theme Palace. It is a WordPress Educational Theme suitable for school, college, university and any other educational consultancy. It’s eye appealing design and highly dynamic features uplifts your organization’s reputation. It comes with a wide number of options so you can modify Header-Image, Homepage-Sections, Menus, Breadcrumb, Widgets and much more, directly from theme customizer. It is not limited to educational purpose only but it can be used for other-purposes too. This theme is translation ready and major browsers supportive.
Enlighten

Enlighten is a responsive FREE education WordPress theme ideal for creating college, school, university and other academic/ educational websites. It is a fully Customizer based user-friendly theme which allows you to customize most of the theme settings instantly with live real time live previews. It is a clean and elegant modern WordPress theme with plenty of flexibility and features – you can use for various types of business websites as well. Enlighten is fully mobile-responsive so that your website content is sure to look great on any device. It features homepage sliders, Multiple menu options, carousel portfolio and service section, video section, client section etc. It is a fully widgetized theme with multiple widget areas. Create a beautiful education website and enlighten the world. For Demo https://demo.accesspressthemes.com/enlighten
Enrollment Lite

Enrollment Lite is the child theme of Enrollment which is a clean and modern WordPress Theme for all kinds of Educational center like School, College, University & Training center. It is perfect for any kind of Educational website. It is easy to use & has powerful features. Launch your institutional site with the Enrollment education WordPress theme!
Gillian

Gillian is focused on organizing and presenting large amounts of content in a logical, useful, and visually appealing manner. Fully responsive and accessibility ready, Gillian is suitable for education institutions, blogging platforms, libraries, and more. Gillian ships with a header image ready for use, which you can keep, delete, or replace as you see fit. Some other features of Gillian include: three layout templates, optional locations for additional menus, an optional social media menu with Font Awesome icons integrated, widgetized areas (two sidebars and in the footer), and color customization options to make the theme uniquely yours.
GivingPress Lite
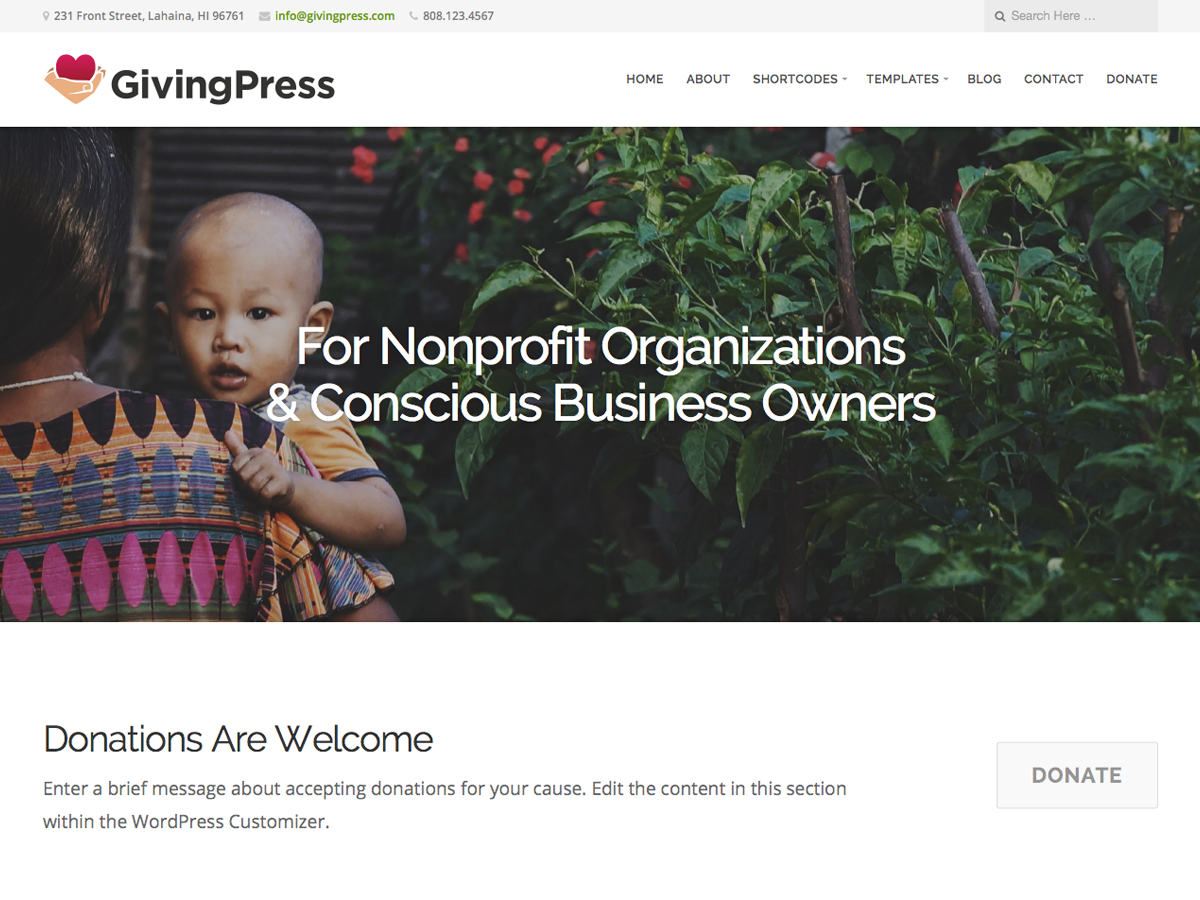
A WordPress theme for nonprofit organizations, charities, foundations and cause-driven businesses. GivingPress provides professional website solutions for nonprofit organizations. The theme is perfect for churches, scholarships, education, healthcare, scientific reasearch, political, charity, humanitarian, club and association websites. The responsive design features a modern aesthetic with an emphasis on collecting donations and fundraising. Visit the GivingPress site for more information.
Graduate

Graduate is an educational theme developed by Theme Palace. It is a multipurpose WordPress Educational Theme suitable for school, college, university, digital agency as well as business purposes. It’s eye appealing design and highly dynamic features uplifts your organization’s reputation. It comes with multiple colors and layouts to support your organization’s branding. It comes with a wide variety of options so you can modify Layout, Styling, Featured Slider, Menus, Breadcrumb, Widgets and much more, directly from theme customizer. Graduate can be adapted to any kind of industry – not only educational but also in any kind of academy. This theme is TP Education and WooCommerce Plugin compatible, translation ready and major browsers supportive.
Great

Great theme is a beautifully designed responsive, multipurpose and customizable WordPress Theme for your amazing website. Theme can be used for travel, business corporate/finance, nature, science, green thinking, photography, health research, personal portfolio, Church, non-profit, online shop, eCommerce, hotels, baby kids, academic university education, primary school for children, design/art and any other creative and minimalistic style website. Great Theme well suited for food recipes, fashion, lifestyle, sports, art photography, design and any other website or blogs. Also, you can use it as educational purposes, such as childhood education, children, toddler, preschool, academy teachers, kindergarten schools, kids etc. It’s a free WordPress theme with premium functionality and design. Developed using CSS 3 that makes it mobile and tablets friendly. Theme comes with jquery responsive slider. It is easily customizable with numerous theme options. It has primary color option to match your logo & website, custom logo upload, pick font awesome icon for your site title, custom backgrounds, home page slider widget, 3 footer widgets, responsive dropdown menu, contact details (address, telephone, email), social media icons, services, projects, clients, latest news from your blog, featured pages, translation ready and many more. Great theme is optimized to work with WP-PageNavi, Jetpack, Contact Form 7, bbPress, WooCommerce and other popular free/premium plugins. Languages: Albanian (Shqip), Arabic (العربية), Azerbaijani (AzÉ™rbaycan dili), Basque (Euskara), Bengali (বাংলা), Bosnian (Bosanski), Bulgarian (БългарÑки), Catalan (Català ), Chinese (China) (简体ä¸æ–‡), Chinese (Taiwan) (ç¹é«”ä¸æ–‡), Croatian (Hrvatski), Danish (Dansk), Dutch (Nederlands), Esperanto (Esperanto), Estonian (Eesti), Finnish (Suomi), French (France) (Français), Galician (Galego), German (Deutsch), German (Switzerland) (Deutsch (Schweiz)), Greek (Ελληνικά), Hebrew (עִבְרִית), Hungarian (Magyar), Icelandic (Ãslenska), Indonesian (Bahasa Indonesia), Italian (Italiano), Japanese (日本語), Korean (í•œêµì–´), Lithuanian (Lietuvių kalba), Norwegian (BokmÃ¥l) (Norsk bokmÃ¥l), Norwegian (Nynorsk) (Norsk nynorsk), Persian (Ùارسی), Polish (Polski), Portuguese (Brazil) (Português do Brasil), Portuguese (Portugal), Romanian (Română), Russian (РуÑÑкий), Serbian (СрпÑки језик), Slovak (SlovenÄina), Slovenian (SlovenÅ¡Äina), Spanish (Mexico) (Español de México), Spanish (Peru) (Español de Perú), Spanish (Spain) (Español), Tagalog (Tagalog), Thai (ไทย), Turkish (Türkçe), Ukrainian (УкраїнÑька), Welsh (Cymraeg)
GTL Multipurpose

GTL Multipurpose is a simple, beautifully designed responsive multipuropose WordPress theme. This theme can be easily customized to make business, corporate, yoga, blog, construction, education, portfolio, travel and tour, news, beauty, fitness and many more websites. We support via online chat, email, support forum.
HashOne
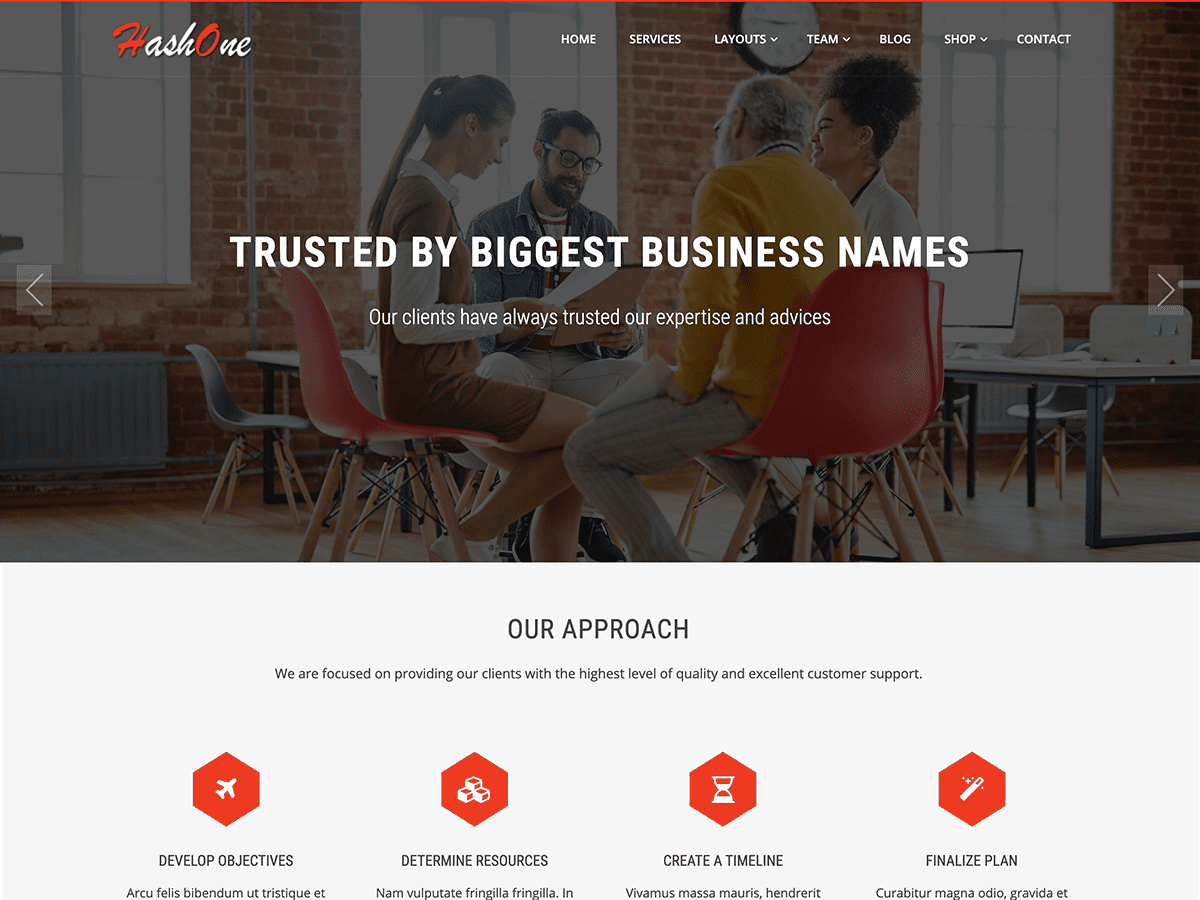
HashOne – a powerful multipurpose WordPress Theme by HashThemes is packed with lots of features for creating a full packaged website that can be used by a business, restaurant, freelancers, photographers, bloggers, education firms, non-profit organization and creative agencies. The theme is fully responsive and mobile friendly and has lots of customization possibilities with various home page sections to showcase varieties of content. The theme can be used to set up a single page website with animated content that adds charm to the website with additional parallax effect. The theme is SEO friendly, Translation ready, Woo Commerce compatible and integrates seamlessly with almost all popular WordPress Plugins. For Demo http://demo.hashthemes.com/hashone
Higher Education

Higher Education is a simple, clean and user-friendly Education WordPress theme especially designed for Schools, Universities and Academic Institutions. The responsive layout and beautiful design make your website look welcoming. The theme provides your visitors an easy access to any area they like. The Higher Education WordPress theme has powerful theme customization options as well. It has a large roster of versatile features such as custom header media, logo, custom menu, social icons, featured slider, hero content, featured slider, promotion headline, portfolio, logo slider, courses, professors, testimonials, events, news, and more. With an array of crucial features filled in it, Higher Education is perfect for schools, universities, language classes, professional courses, and all the academic institutions. Make your website more engaging and informative with Higher Education. The theme gives the perfect niche that is dynamic, multifunctional and upfront. This theme is translation ready. For more details, check out Theme Instructions at https://catchthemes.com/theme-instructions/higher-education/, Support at https://catchthemes.com/support/ and Demo at https://catchthemes.com/demo/higher-education/
Hoot Business

Fast loading and clean design for local business, church, education, marketing, web agency, online, affiliate, content and product sites. Translation and multi-lingual ( multiple languages ) ready! It has multiple powerful widgets to display content in various forms. SEO optimized and works with Yoast SEO plugin, Contect Form 7, Jetpack, Google Maps mappress, Page Builder and various other plugins. Theme support is available at https://wphoot.com/support/ You can also check out the theme instructions at https://wphoot.com/support/hoot-business/ and demo at https://demo.wphoot.com/hoot-business/ for a closer look.
iThemer

iThemer is Resume and Portfolio theme with simple list blog layout. It Consist of Animated Banner , About Us , Services, Work & Portfolio with fancybox, Counter Up, Experience and Education timeline, Carousel Grid Blog, Call to Action, Contact Us Section with Contact form 7, Client and Footer Widgets. The blog and single page comes with right sidebar.iThemer WordPress theme is specially designed for multipurpose portfolio theme. it also can be managed as One Page Theme. Detail: https://ithemer.com/themes/ithemer-free-wordpress-theme/ ,View Demo: https://ithemer.com/view?theme=ithemer
Journalistic

Journalistic is SEO optimized for the search engines Google and Bing, while being a modern and simple responsive WordPress theme. Journalists, writers and authors can use it to publish news through blogging or writing with our minimalistic multipurpose magazine / newspaper theme. We have made clean code so the load time is fast, quick page speed is a big part of our SEO friendly theme. Whether you like food, fashion, photography, travel or need a business portfolio then our minimal article theme is a good choice. If you are a corporate business or agency, you can use it to design your creative & elegant landing page. Bloggers can use ads like adsense and affiliate marketing for your blog page about books, actors or other entertainment as well as write a journal / biography about your personal life with our typography optimised, reading friendly, flat and light design. We don’t yet fully support websites having a one page / single page with post builder plugins, but we will add that soon together with making special white and dark layouts for school, education, coach and conference sites. Journalistic has many features such as widgets, header image and responsive design so it works on mobile phones too.
Kids Education

Kids Education is an educational theme developed by Theme Palace. Kids Education is a multipurpose WordPress Educational Theme suitable for Kindergartens, daycare, Primary Schools, Secondary Schools and High Schools. Kids Education Theme is also suitable for any educational activities and, with the colorful design, it is ideal for toys stores, activities related to children too. Kids Education can be adapted to any kind of industry – not only educational but also babysitting and summer camps. All pages are optimized in order to perform, in a simple and fast way. It comes with a wide variety of options so you can modify Styling, Featured Slider, Menus, Breadcrumb, Widgets and much more, directly from theme customizer. This theme is Woocommerce compatible and translation ready.
Kindergarten Education

The Kindergarten Education is a beautiful and minimal kids school theme . It is a kids school theme with plenty of features, user-friendly customization and personalization options. It includes features such as quick page speed, mobile friendly design, cross browser compatibility, SEO friendly, translation ready, etc. It shows a large slider with a banner that has a Call to Action Button (CTA) to attract the visitors. It is compatible with WooCommerce and features layouts for products, posts, and pages. It has secure and clean codes that do not allow you to write even a single line of code. It offers a bunch of shortcodes that helps in incorporating functional features. This kindergarten theme is based on Bootstrap framework which enhances the speed of development. Also, it has an interactive demo for easy understanding. View full demo here: https://www.buywptemplates.com/kindergarten-education-pro/
Kotre

Kotre is a multipurpose, easy to use and powerful free WooCommerce theme. This free eCommerce theme is minimal in design and perfect for an online store, digital stores and WooCommerce sites. However, Kotre can also be used for business, corporate, education, architecture firm, lawyers, furniture companies and all type of creative websites. It works perfectly with Gutenberg, Elementor, Beaver Builder, Brizy, KingComposer and other page builders. Additionally, it comes with 5 ready to import starter sites.
Lawyer Zone

Lawyer Zone is chic and modern WordPress theme designed especially for Law business. It can be used to create a well-organized online presence of law organization such as Law offices and law firms. You can also use it as a portfolio page for people like barristers, advocates, legal officers, counsels, and solicitors and other people involved in the law field. It’s a multipurpose theme so it can be used for many other purposes such as corporate, business education and medical sites. The theme possesses some splendid features which include Advanced Custom Widgets, Page Builder Compatible, Unlimited Slider, Advanced Logo Options, Custom Sidebar Areas, Social Media Integration, Translation Ready, Category Color Options, Browser Compatibility, and much more. Its integrated with WooCommerce so the user can easily set up an online store. Even if you are a non-techy you use easily modify the theme and design the pages as desired. Thus, one of the best choice for creating a law website.
Lectura Lite

Lectura Lite is a simplified and free version of the Lectura WordPress Education Theme developed for schools, universities, kindergartens, organizations, companies, etc.
Lighthouse
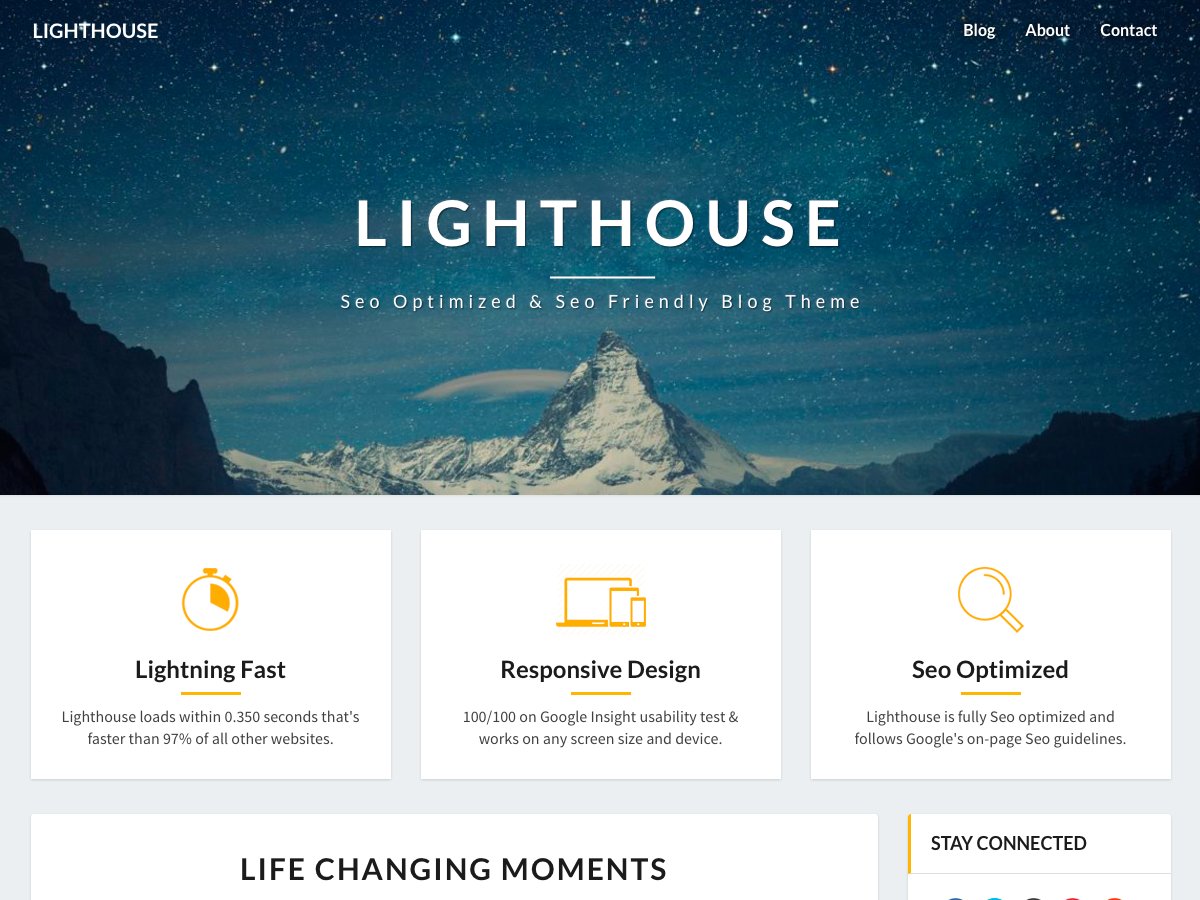
Lighthouse is SEO optimized for the search engines Google and Bing, while being a modern and simple responsive WordPress theme. Journalists, writers and authors can use it to publish news through blogging or writing with our minimalistic multipurpose magazine / newspaper theme. We have made clean code so the load time is fast, quick page speed is a big part of our SEO friendly theme. Whether you like food, fashion, photography, travel or need a business portfolio then our minimal article theme is a good choice. If you are a corporate business or agency, you can use it to design your creative & elegant landing page. Bloggers can use ads like adsense and affiliate marketing for your blog page about books, actors or other entertainment as well as write a journal / biography about your personal life with our typography optimised, reading friendly, flat and light design. We don’t yet fully support websites having a one page / single page with post builder plugins, but we will add that soon together with making special white and dark layouts for school, education, coach and conference sites. Lighthouse has many features such as widgets, header image and responsive design so it works on mobile phones too.
Magazine Hoot

Magazine Hoot is a multicolor news magazine for marketing, education, online, affiliate, content and product sites. It has multiple powerful widgets to display content in various forms. SEO optimized and works with Yoast SEO plugin, Contect Form 7, Jetpack, Google Maps mappress, Page Builder and various other plugins. Theme support is available at https://wphoot.com/support/ You can also check out the theme instructions at https://wphoot.com/support/magazine-hoot/ and demo at https://demo.wphoot.com/magazine-hoot/ for a closer look.
Mercantile

Mercantile is the most feature-rich, powerful, advanced, easy to use and maintain multipurpose WordPress theme with highly customizable theme options. Mercantile theme is crafted to provide all the important features that you need in promoting and running your business, corporate or any kinds of sites in the web world. The main features of Mercantile are Integration with Page Builder by SiteOrigin, WooCommerce Compatible, Advanced Custom Widgets, WordPress Live Customizer and One page or Multi-page layout. It is entirely innovative, infinitely creative and features rich ultimate WordPress theme. Mercantile provides you with a quick and efficient way to create any kinds of websites which may include corporate, business, agency, portfolio, showcase, medical, education, travel, restaurant, personal, blogging, and more. Some highlighted features are, beautiful Featured-slider section, Service Section, Parallax featured section, Alternative feature section, Testimonial section, Contact section, Portfolio section as well as Beautiful blog section. You can easily set Right sidebar, Left sidebar or Full width on the inner pages. Site colour can be changed with a single click. Custom CSS options, related post and breadcrumb options will help to customize your site even more. Theme documentation and quick and helpful supports help you to master this theme within no time. Finally, Mercantile theme comes with the limitless customization options, powerful features, quality code, elegant design, and incredible support. Try this versatile theme. Support Forum: http://www.acmethemes.com/supports/ Demos: http://www.demo.acmethemes.com/mercantile/, http://www.demo.acmethemes.com/mercantile/home-1/, http://www.demo.acmethemes.com/mercantile/home-2/, http://www.demo.acmethemes.com/mercantile/home-3/, http://www.demo.acmethemes.com/mercantile/shop/
NDesign

NDesign is a free single-page website template with a clean, modern, stylish and innovative look for every creative mind out of there. The theme is clutter free and was built keeping the simplicity of the design in mind. It comes with a single click installation; you just have to replace the content with your own and you are all good to go. Responsive and cross-compatible, NDesign renders pixel-perfect on every browser, device, and screen. It’s wide range of color choices results into fun and professional looking theme. This template is the best pick for agencies, personal portfolio, corporate website, photographers, and for education industry.
Nevark

Multipurpose style for news, marketing, education, online business, affiliate, service and product sites. Nevark is easily customizable, fast loading, retina-ready, responsive theme with a modern bold design perfect for web agencies, studios, photography, portfolio, churches, corporate, personal and business websites. Easy to configure and customize, Nevark supports multiple widgets for flexible layout and design both on desktop and responsive mobile screens. SEO optimized and works with Yoast SEO plugin, Contect Form 7, Jetpack, Google Maps mappress, Page Builder, Elementor and various other plugins. Theme support is available at https://wphoot.com/support/ You can also check out the theme instructions at https://wphoot.com/support/nevark/ and demo at https://demo.wphoot.com/nevark/ for a closer look.
Noteblog

Noteblog is SEO optimized for the search engines Google and Bing, while being a modern and simple responsive WordPress theme. Journalists, writers and authors can use it to publish news through blogging or writing with our minimalistic multipurpose magazine / newspaper theme. We have made clean code so the load time is fast, quick page speed is a big part of our SEO friendly theme. Whether you like food, fashion, photography, travel or need a business portfolio then our minimal article theme is a good choice. If you are a corporate business or agency, you can use it to design your creative & elegant landing page. Bloggers can use ads like adsense and affiliate marketing for your blog page about books, actors or other entertainment as well as write a journal / biography about your personal life with our typography optimised, reading friendly, flat and light design. We don’t yet fully support websites having a one page / single page with post builder plugins, but we will add that soon together with making special white and dark layouts for school, education, coach and conference sites. Noteblog has many features such as widgets, header image and responsive design so it works on mobile phones too.
Online Consulting

Online Consulting is a free finance WordPress theme oriented to consulting, business and financial services. It is perfect platform to create a professional website for business consultant, accountants, investment firms, insurance, tax advisor, startups, financial advisor, marketing and any other consultancy corporations. This is a versatile, tech-savvy and responsive multipurpose website theme that is developed to satisfy all business needs. This theme can also be used for corporate, business, personal blog, law firm, banking, ecommerce, fashion blog, yoga, charity, gym, travel, news, education, transport and any other general business needs. This theme is the perfect and reliable toolkit for crafting impressive websites to grow your online business. Demo Link: http://www.gracethemesdemo.com/online-consulting/
PhotoBlogster

PhotoBlogster is SEO optimized for the search engines Google and Bing, while being a modern and simple responsive WordPress theme. photographers, writers and authors can use it to publish news through blogging or writing with our minimalistic multipurpose magazine / newspaper / photography theme. We have made clean code so the load time is fast, quick page speed is a big part of our SEO friendly theme. Whether you like food, fashion, photography, travel or need a business portfolio then our minimal article theme is a good choice. If you are a corporate business or agency, you can use it to design your creative & elegant landing page. Bloggers can use ads like adsense and affiliate marketing for your blog page about books, actors or other entertainment as well as write a journal / biography about your personal life with our typography optimised, reading friendly, flat and light design. We don’t yet fully support websites having a one page / single page with post builder plugins, but we will add that soon together with making special white and dark layouts for school, education, coach and conference sites. PhotoBlogster has many features such as widgets, header image and responsive design so it works on mobile phones too. But it is mainly designed for photography portfolios and photography blogs.
Play School Kindergarten

Play School Kindergarten is a beautiful and professional WordPress theme made for kindergartens, nurseries, play schools, preschools, childcare centres, elementary and primary schools. It can be used by people providing online courses and e-learning. You can also use this multipurpose theme if you run a training centre or any educational institutions. The theme serves the dedicated purpose of designing a site pertaining to children with its fun images and bright colours. Its colour scheme is so chosen to give it a fresh look as required for a child theme. The theme is fully responsive and cross-browser compatible to serve a wide range of audience. It is translation ready to satisfy various demographics with ease. Though it is fun-filled but that does not make it messy. It has a clean design and loads faster. Short codes are implemented to make its coding further easy and clean. The Play School Kindergarten theme is customizable which allows you to make mdall changes to it on your own. You can change its background, colour, logo, tagline etc. according to your requirements. It has dedicated header and footer area to add elements to it. It is an SEO-friendly theme which has social media integration to share your content on various networking platforms. Demo: https://luzuk.com/demo/play-School-Kindergarten/
Preschool and Kindergarten

Preschool and Kindergarten is a beautiful educational WordPress theme suitable for Kindergarten, Schools, Elementary, Primary Schools, Universities, Academy, Secondary School, LMS, Training Center and Educational institutions. Preschool and Kindergarten is also suitable for education and children activities. It is mobile responsive and translation ready. The theme is very flexible and versatile. In other words, it is multipurpose theme. It can be used to build various types of websites for business, corporate, charity, food, recipe, travel, photography, feminine, lifestyle, events, etc. The theme is highly customizable with various features and personalization options. Preschool and Kindergarten comes with several features to make a user-friendly, interactive and visually stunning website. Such features include custom menu, attractive slider, about section, courses section, testimonial section, featured programs, Banner with Call to Action Button (CTA), and social media. The theme is SEO friendly with optimized codes, which make it easy for your site to rank on Google and other search engines. The theme is properly tested and optimized for speed and faster page load time and has a secure and clean code. The theme is also translation ready. Designed with visitor engagement in mind, Preschool and Kindergarten theme helps you to easily and intuitively create professional and appealing websites. If your preschool, kindergarten, school, college or university needs an online home that is dynamic and multi-functional, Preschool and Kindergarten theme is a good place to start. Check the demo at https://demo.rarathemes.com/preschool-and-kindergarten/, documentation at https://docs.rarathemes.com/docs/preschool-and-kindergarten/, and get support at https://rarathemes.com/support-ticket/.
Prevalent

Prevalent is a clean, professional and beautiful free travel WordPress theme for your travel agency or tour website. It is mainly designed with tourism professionals in mind and focus on offering various travel, adventure and tour packages. This theme can also be use for business, corporate, construction, architect, personal, blog, photography, hotel, yoga, fiteness blub, education, study, sports, modeling, beauty, spa, and any other business websites. Demo Link: https://gracethemes.com/demo/prevalent/
Prolific

Prolific, as the name suggests, is a multi-purpose WordPress theme that suits all your business needs. Prolific is built with quality coding and aesthetic design. Prolific is the best and attractive WordPress theme that is built to provide you with all the important features that you need in uplifting your business. The theme comes with boundless possibilities to assemble any kind of websites which may include corporate, business, agency, portfolio, education, travel, personal, blogging, and more. We provide stellar support to our users. Support Forum: http://www.acmethemes.com/supports/ Demo: http://www.acmethemes.com/demo/?theme=prolific
QuotesIn

QuotesIn is a Pinterest style responsive masonry grid WordPress theme with Jetpack Infinite scroll support. Designed and developed especially for quotes websites. This is a mobile responsive WordPress theme hence your quotes websites look impressive even on mobile devices. Also you can use it for your portfolio, blogging, education or any type of site.
Rara Academic

Rara Academic is a professionally designed WordPress theme which is best suited for Education Institution, Schools and Universities. Although developed with Education institutions in mind, this theme is not limited to just educational websites. The theme is flexible enough to be used for business and corporate websites. Theme is highly customizable with layout settings and several other theme options which can be customized by using Powerful Theme Options panel. Rara Academic comes with several features to make user-friendly, interactive and visually stunning website. Such features include custom menu, Call to Action Button, Full width Banner, Testimonial section, Courses section and social media. It has four footer areas and a right sidebar and includes three custom widgets for the recent posts, popular posts, and social media. The theme is SEO friendly with optimized codes, which make it easy for your site to rank on Google and other search engines. The theme is rigorously tested and optimized for speed and faster page load time and has a secure and clean code. The theme is also translation ready. Designed with visitor engagement in mind, Rara Academic helps you to easily and intuitively create professional and appealing websites. Check the demo at https://demo.rarathemes.com/rara-academic/, documentation at https://docs.rarathemes.com/docs/rara-academic/ and get support at https://rarathemes.com/support-ticket/.
Rara Business

Rara Business is a free WordPress theme for business and corporate websites. You can use it to build small business (restaurants/cafe, travel, education, hotel, construction, events, wedding planners, fitness, affiliate, fashion, lawyer, consulting, sport/medical shops, spa/temas, political), portfolio, church, online agencies and firms, charity, ecommerce (WooCommerce), and freelancers websites. Rara Business is widgetized, visually appealing and clean. It is responsive, Schema.org compatible, SEO friendly, RTL compatible, speed optimized, and translation ready. Check demo at https://demo.rarathemes.com/rara-business/, read the documentation at https://docs.rarathemes.com/docs/rara-business/, and get support at https://rarathemes.com/support-ticket/.
Scholarship

Scholarship is a the Best Free WordPress Education Theme designed for university, college, school, online courses and other education related websites. Theme displays your site in the best possible way on smartphones, tablets, and laptops, as well as large desktop screens. The theme has a clean design with powerful features. Scholarship would be the best choice for anyone with an intent to promote education online. Launch your institutional site with the Scholarship education WordPress theme! We have great customer support via email, support forum. View full Demo here: http://demo.mysterythemes.com/scholarship/ | Support: https://mysterythemes.com/support/forum/themes/free-themes/
Seek

Seek is a creative, clean, responsive and multi-layout highly organized WordPress magazine or news theme which is made to be used by online magazines, newspapers, editors, journalists, publishing units, bloggers, informative sites, educational websites, content writers, digital news media and other similar websites. Seek is optmized and cross browser compatible which will make your site attractive and eye catching in any browser and different variations of devices screen size. Seek is build taking SEO, speed & content management in mind. Additional features from plugins like Booster Extension and Mailchimp Suscription will provide your content easy social share, as well as like-dislike option on direct connection to your user or reader. As Our theme is Comaptible with both old and new editor so you will not encounter any problem on setting your site up. Demo :https://demo.themeinwp.com/seek/
SEOPress

SEOPress is a MultiPurpose, Responsive, Fast to load, Customizable and Fully SEO friendly WordPres Theme. SEOPress theme will boost ranking of your website in search engines because it follows latest Google Web Master Guidelines and structured data implemented according schema.org project. SEOPress theme used latest version of bootstrap for responsive layout and fully compatible with all types of mobile and tablet devices as well as desktop browser. SEOPress theme have multiple header layout, blog layout, responsive slider, page builder and mega menu features. All theme options are in customize so you will see changes happen on your website in real time as you make them. SEOPress theme also have right sidebar, full width, full width for page builder, landing page template and fully compatible with woocommerce plugin so it can be used for various types of websites such as online selling, blog, one page, landing page, construction, travel, hotel, real estate, restaurant, photography, industrial, portfolio, woocommerce, gym, education, affiliate, job board and portal, jewelry, local business, creative agency, ecommerce, architecture, event, gallery, lifestyle, lens, listing, yoga, wedding, university, school, sports, quotes and similar websites.
Serenity Lite

Serenity Lite is a clean, modern and elegant one page theme designed for professionals, businesses & self-employed individuals. Its strength lies in displaying all your content on a single page, is easily customizable and allows you to build a stunning website in minutes. Serenity Lite doesn’t depend on bloated frameworks or page-builders to display content but relies on powerful native WordPress widgets, pages and Live Customizer; making it ideal for both beginners and experienced users. It’s responsive, search engine friendly and light-weight. Serenity Lite can be used for small business, startup, professional, agency, firm as well as personal portfolio websites, blogs and niche sites like: Cafe, Beauty Spa, Charity, Yoga, Restaurant, Wedding, Dentist, Architect, Medical Doctor, Teacher, Educator, Education, Lawyer, Attorney, Consultant, Personal Trainer, Musician, Real Estate Agent, Private Courses, Translator, Travel Blogger, Tourism, Tour Guide, Daycare, Health & Fitness Expert, Writer, Author, Small Business and many more. Features Include: Fully responsive layout, Font Awesome icons, Google fonts, contact form, Mailchimp newsletter form, 11 one-page sections (Hero, Features, About, Services, Photo Gallery, Team Members, Testimonials, Call-to-Action, Brand Logos, Newsletter, Latest Blog and Contact). Try it out, and see how easy it is to build a professional website.
Suki

Suki is a free multi-purpose WordPress theme that is lightweight, fast, highly customizable, and flexible. Build any kind of websites, blog, business, portfolio, WooCommerce storefronts, and also niche websites like Spa, Restaurant, Wedding, Non Profit, Education, Hotel, etc. Fully compatible with Gutenberg, Elementor, Brizy, Visual Composer, Beaver Builder, Divi, SiteOrigin, and other page builders. Tons of design options for customizing typography, colors, layout, and also free built-in Header and Footer builder. Built with SEO in mind, Suki is incredibly fast, mobile optimized, 100% HTML valid, and integrated with Schema.org structured data. Furthermore, Suki supports accessibility, multi-language translation, and RTL languages. Learn more about the full features and also “one click demo import” feature at https://sukiwp.com/.
Tech Literacy

Tech Literacy is a free, clean, minimalistic, responsive, mobile-friendly WordPress theme. Tech Literacy suitable for education, literacy websites, online stores, personal portfolio, agencies, start-ups. However, due to its flexibility and easiness it can be used to create any types of sites. this Theme build in customizer it is very easy to use and user friendly. Theme includes lots of features like Drag & Drop page builder.
TextBook
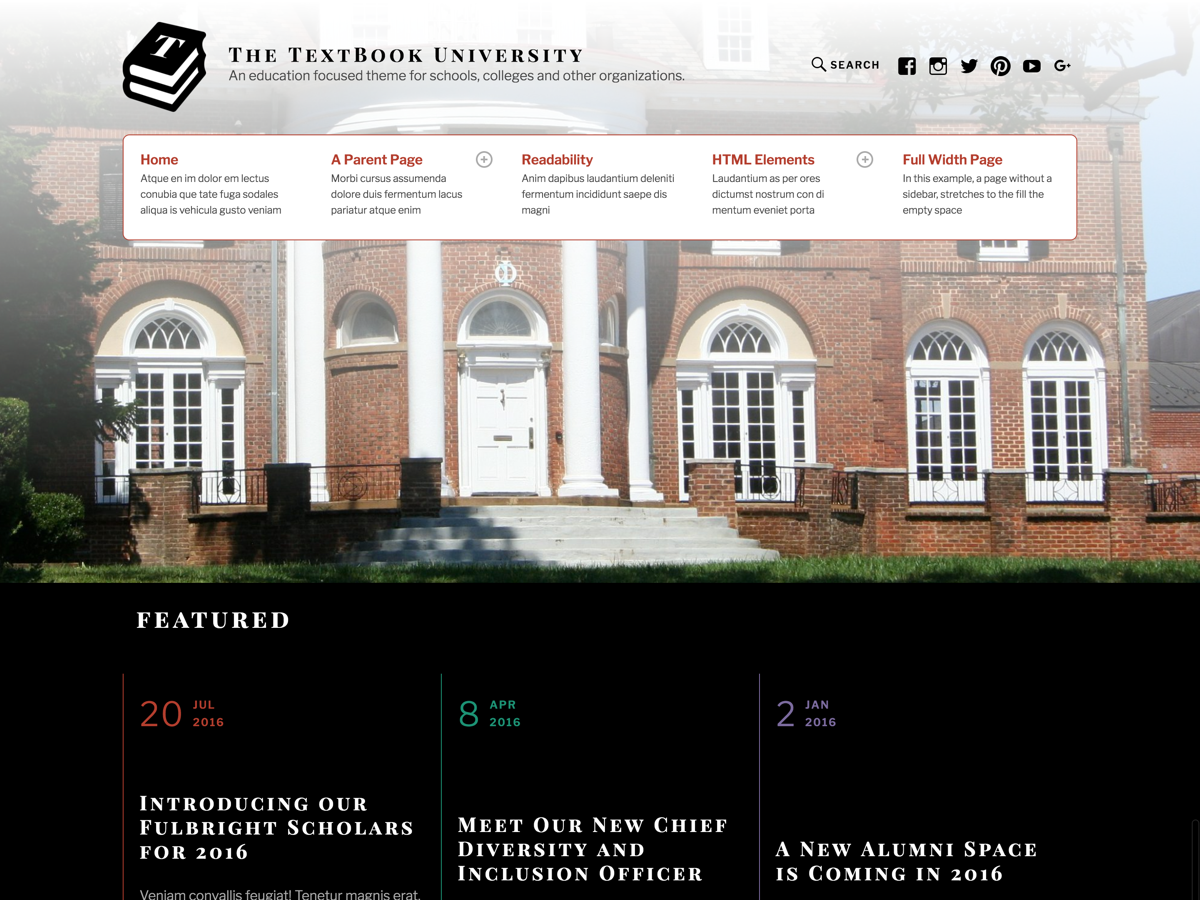
TextBook is a theme for colleges, schools and organizations focused on education.
Township Lite

Township is a Multipurpose construction WordPress Theme for for business, freelancers and private use, clean and unique with a great elegant multipurpose responsive design for your website. a lightweight and fully responsive theme, is an attractive, modern, easy to use and responsive WordPress theme with colorful design and stunning flexibility. This theme can be used for real estate, blog, news, landing page, travel, store, food, restaurant, photography, hotel, school, education, fitness, fashion store or any business. Township have customizer by this you can easily customize theme in just few clicks. This theme gives you awesome looking website, The theme is SEO friendly with optimized codes, which make it easy for your site to rank on Google and other search engines. This theme is SEO friendly. Check demo at: https://www.themescaliber.com/township-theme/
TS Mobile App

TS Mobile APP is a stunning and multipurpose unique business WordPress theme that can easily bring your website to perfection. Neat and extremely easy to use, it will truly make your website stand out among others. TS Mobile APP is a free WordPress theme for websites. It is an innovative lead capturing cum landing page WordPress theme. It is ideal for seeking reviews of upcoming products, mobile apps, gadgets or any other business proposition. The theme can be used by varying businesses like hotel, restaurant, real estate, gym, education, construction, tours and travel, photography, job board and portal, local business, architecture, events, gallery exhibition, fashion apparels, lens, yoga, university, school, sports, and similar websites. TS Mobile APP has niche specific design, responsive layout and theme customizer to manage sliders, sidebars, header and footer without involving in the coding part. Its secure and clean code provides faster page loading. It provides numerous customization options making it effortless for you to make a personalized website. So, create a professional website with optimized codes with this theme. Demo: https://www.themeshopy.com/bb-mobile-application-theme/
Uni Education

Uni Education is a elegantly crafted educational theme. It is blazingly fast, extremely light-weight, search engine friendly and very easy to use. Uni Education theme is suitable for college, School, university, LMS, Training Center, Academy, Primary School, High School and Kindergarten and various educational websites. Uni Education theme has wide list of customizable features including front page customizable sections with customizer api and widgets, wide and boxed layout and many more options. It comes with cross-browser compatibility, mobile friendly design and responsive features.
University
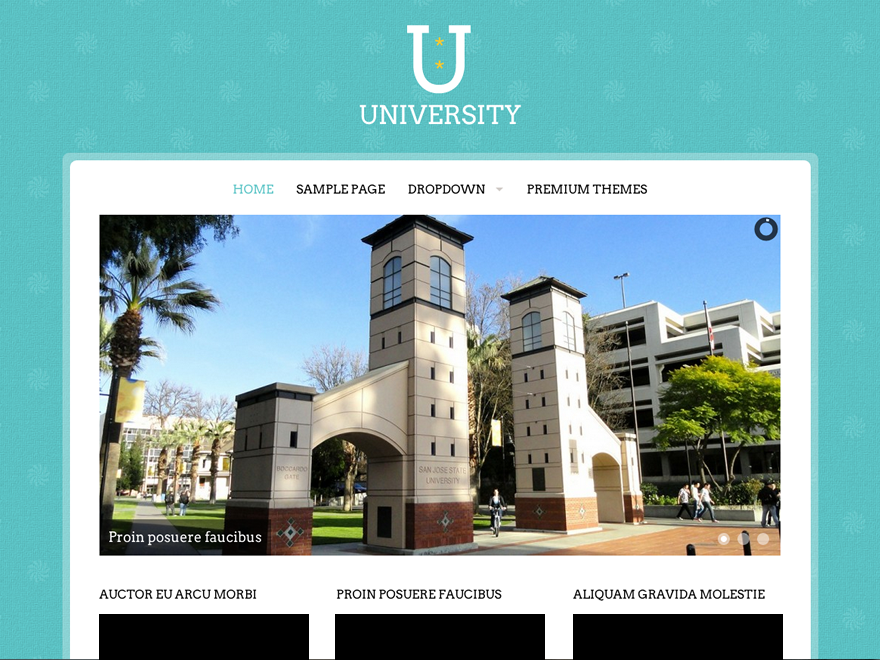
A theme that can be used for educational, academic, institutions or business websites. Fully responsive. Front page image slider. Featured posts or pages below the slider. Integrated social media icon fonts, 11 available. Easily upload your logo image.
University Hub

University Hub, an Education theme by WEN Themes, is a responsive WordPress theme for university, school, college or other educational institutions. Along with educational institutions, University Hub is flexible and loaded with several features to also cater to the needs of design agencies, corporate websites and small businesses. Official Support Forum: https://themepalace.com/support-forum/ Full Demo: https://wenthemes.com/theme-demos/?demo=university-hub
Woostify

Woostify is fast, lightweight, responsive and super flexible WooCommerce theme built with SEO, speed, and usability in mind. The theme works great with any of your favorite page builder likes Elementor, Beaver Builder, SiteOrigin, Thrive Architect, Divi, Visual Composer, etc. Therefore, you can build any type of websites like shop, business agencies, corporate, portfolio, education, university portal, consulting, church, restaurant, medical and so on. Woostify is compatible with all well-coded plugins, including major ones like WooCommerce, OrbitFox, Yoast, BuddyPress, bbPress, etc. Learn more about the theme and ready to import demo sites at https://woostify.com
Writers Blogily

Writers Blogily is your seo friendly & responsive theme made for blogging, newspapers or journalist writing. The code is clean so your website will be quick and load fast with great page speed. The theme is simple to setup but has a lot of features for both affiliate marketing, i.e. lots of advertisement space for affiliate programs such as Google AdSense – of course this kind of website requires a SEO optimized, creative & modern theme which Writers Blogily is. Writers is a true multi purpose theme, Beaver Pagebuilder is implemented so you can create your corporate business landing page, an elegant agency one page or a simply photography portfolio. Authors & bloggers can easily create a simple and minimalistic blog and customize it to a niche with the header, so you can write about anything from food, travel, fashion, lifestyle, reviews, products or other entertainment niches. To sum it up the theme is SEO optimised, responsive so it works on tablets, desktop, mobile phones, on every device, such as an Apple or Android. The theme allows you to create a news paper or 1 page / single page, coach, school or education conference website with very low amount of effort required since the design looks beautiful out of box.
Zakra

Zakra is flexible, fast, lightweight and modern multipurpose theme that comes with many starter free sites (currently 10+ free starter sites and more will be added later) that you can use to make your site beautiful and professional. Check all the starter sites at https://demo.themegrill.com/zakra-demos/. Suitable for personal blog, portfolio, WooCommerce stores, business websites and niche-based sites (like Cafe, Spa, Charity, Yoga, Wedding, Dentist, Education etc) as well. Works with Elementor plus other major page builders so you can create any layout you want. The theme is responsive, Gutenberg compatible, SEO friendly, translation ready and major WordPress plugins compatible.
ZeroError Lite

ZeroError lite is a free business WordPress theme which can be used for multiple purposes. It perfectly suits your business or corporate website and is specially created for all business standards. ZeroError free WordPress Theme is SEO ready, multipurpose, elegant, responsive and clean coded. This theme can be used for business, corporate, construction, charity, hotel, restaurants, food, yoga, creative agency, fitness club, gym, meditation, school education, modeling, beauty, medical, massage spa, wedding, photography, personal blog, news, mazgine or any other business brands. Demo: http://gracethemes.com/demo/zeroerror/


