Physical Address
304 North Cardinal St.
Dorchester Center, MA 02124
Physical Address
304 North Cardinal St.
Dorchester Center, MA 02124
Tech News, Advice and Tutorials
Tech News, Advice and Tutorials
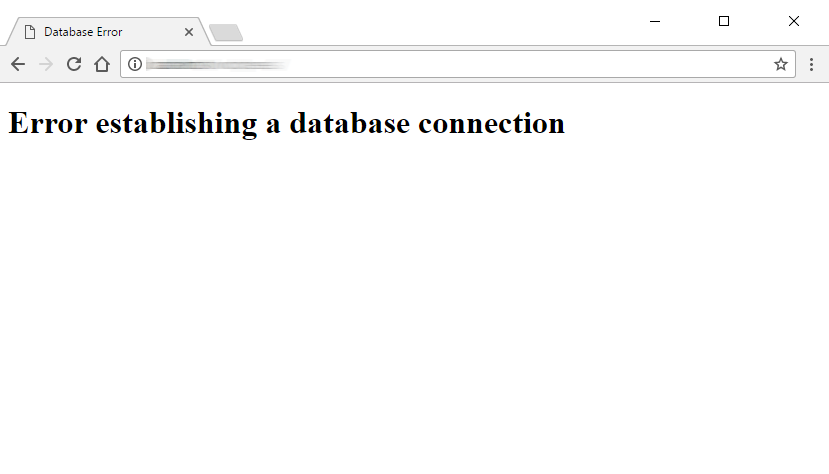
You wake up one morning and attempt to log into your website only to discover it’s displaying a white page and an error message: Error Establishing a Database Connection.
Which usually looks something like this,
If you’re running an e-commerce site or generating leads for your business or professional career, this can be worrying as your loosing out on sales. So ideally you want to fix this issue ASAP.
I’ve encountered this problem many, many times over the years and 99% of the time I was able to resolve it quite quickly. So don’t panic. Keep reading this tutorial to learn practical tips on how to fix the error establishing a database connection in WordPress.
First, let’s examine what this error message actually means. In short, you are getting this error because WordPress is unable to connect to the MYSQL database where all the data for your website is stored.
Your database uses a language called MySQL. Your website is reliant on a server-side language called PHP. Whenever your website URL is entered into the browser, WordPress uses PHP to retrieve all the information pertaining to the page from the database and sends it to the visitor’s browser.
The error establishing a database connection you tend to experience is because this MySQL-PHP connection is severed for some reason.

In my experience, this error usually occurs for the following reasons;
Before we start troubleshooting the error, it’s important you generate a backup of your site. This will ensure that if something goes horribly wrong, at least you have a backup you can revert to. In your web hosting admin panel (cPanel) do the following:
Now that you’ve backed up your site, we’re ready to start troubleshooting.
We need to determine if your MYSQL database has been corrupted. If you receive the same “Error Establishing a Database Connection” message when you access your admin panel (http://www.yourwebsite.com/wp-admin/); your database has not been corrupted and you can proceed to the next step in this tutorial.
However, if you receive the following error message:
One or more database tables are unavailable. The database may need to be repaired
Then your MYSQL database has been corrupted and it must be repaired. WordPress has a built in feature that allows you to do this easily.
In the root WordPress file directory, locate the wp-config.php file. Use an FTP client or the File Manager within your web hosting panel (cPanel).
Open the wp-config.php file and add the following line at the bottom of the file:
define('WP_ALLOW_REPAIR', true);
Now navigate to:
www.yourwebsite.com/wp-admin/maint/repair.php
(Replace “yourwebsite.com” with your actual URL)
You should see a page like this.

You now have 2 options. If you’re not in a hurry I recommend selecting the 2nd option: Repair and Optimize Database. This option takes a little longer but it offers a more comprehensive attempt to fix your corrupted database.
Immediately after the repair and optimization process has completed, remove the line of code you added to the wp-config.php file. This repair page can be accessed without the need to log in, so it creates a security issue.
As I mentioned at the beginning of this tutorial one of the most common reasons for this error is an incorrect database name or password which prevents your site’s PHP files from connecting with the MYSQL database.
These settings are found in your sites wp-config.php file in the root directory and contains the following four variables,
It will look like this,
/** The name of the database for WordPress */
define( 'DB_NAME', 'database_name_here' );

/** MySQL database username */
define( 'DB_USER', 'username_here' );

/** MySQL database password */
define( 'DB_PASSWORD', 'password_here' );

/** MySQL hostname */
define( 'DB_HOST', 'localhost' );
Note down these values since you will need to verify them later on.
NOTE: Your DB_HOST value may not be localhost. Depending on your web host, it could be different. For popular web hosts like HostGator, BlueHost or SiteGround, it is localhost. Your localhost value is usually visible within your web hosting panel. If not, you can always contact your web host and ask them to provide it to you.
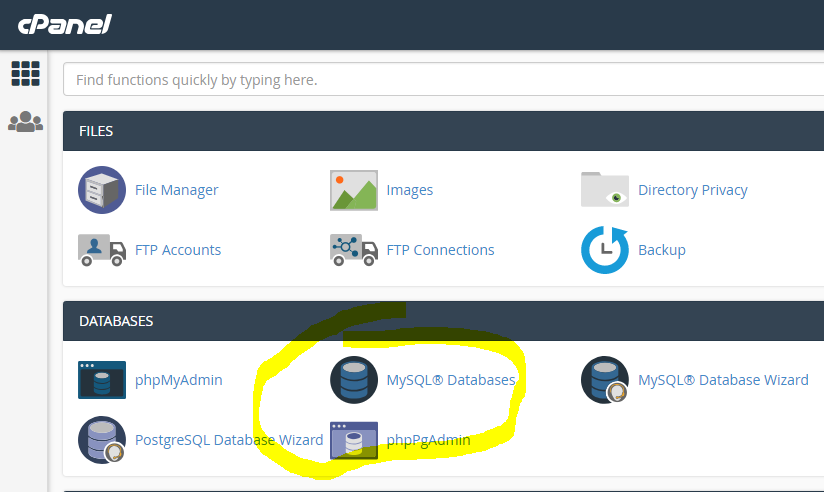
Next, log into your web hosting account panel (cPanel) and locate the section entitled Databases and click on MySQL Databases.
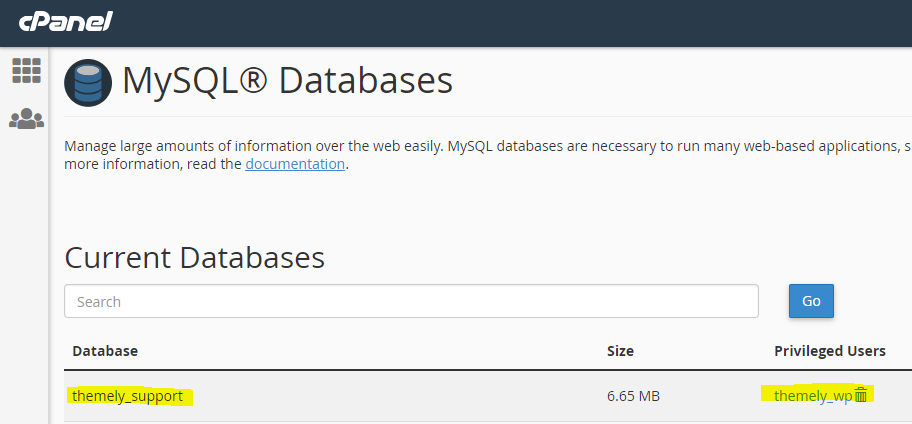
In the Current Databases section you will find a list of all your existing databases. Locate the name of the database you noted down previously.
Verify a user has been assigned to it and that it matches the DB_USER value you noted earlier from the wp-config.php file.
If those values don’t match then you have found the reason for the error and you will need to copy and paste the correct values into the wp-config.php file.
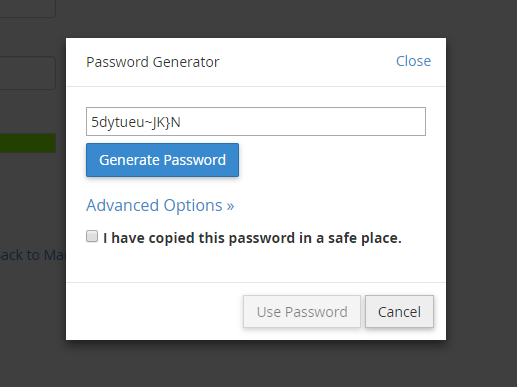
Unfortunately, web hosts generally don’t display passwords for database users in the web hosting panel for security reasons. So, you’ll need to generate a new password and enter it in the DB_PASSWORD field of the wp-config.php file.
Scroll down to the section entitled Current Users and locate the correct user for your database. Click on Change Password to generate a new secure password.

Once you’ve ensured the wp-config.php file contains the correct values for the database name, database user and password, save the file.
Now you can check if the issue has been solved by visiting the front-end of your website (http://www.yourwebsite.com) or by logging into your Admin Dashboard.
Sometimes the error could be due to an issue with the server itself and not your site files or configuration. In order to test and see if your MYSQL databaser server is unresponsive, try creating a new database in your web hosting panel.

If you’re unable to create a new database or it seems to be taking too long, then there’s most likely an issue with the database server itself.
In that case, contact your web hosts technical support department to request assistance.
That is a nice problem to have. It could mean you’re experiencing a huge traffic spike. Someone may have shared your site on social media or a high traffic blog or online newspaper has linked to your website.
In short, it means your server has reached maximum capacity or can’t keep up with the extremely high demand. To check if you’re experiencing a sudden traffic spike you can check your sites analytics software (Google Analytics).
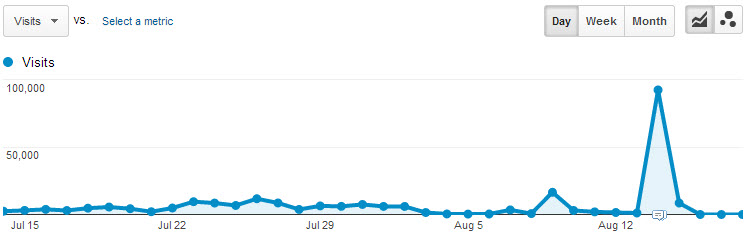
You’ll see a huge spike and a drop-off, indicating your site stopped reporting the traffic because your server is down. The only way to get your site up and running again is to contact your web hosting company to upgrade your hosting plan. Most web hosting companies provide 24/7 customer support and are usually good in providing quick turn-around for upgrades.
But how can you prevent this from happening in the first place? What kind of measures can you implement to make sure your site doesn’t crash when a traffic spike hits? The answer is to get a better hosting plan but not everyone is willing to pay extra in the event your website “may” or “may not” go viral at some point. A good alternative is to use a Content Delivery Network (CDN) like Cloud Flare. Here’s an article explaining what you should do if you’re expecting a huge traffic spike.
So, hopefully you’ve found this article helpful and were able to resolve the issue. If you have any questions or comments use the comment form below and one of our moderators will be glad to respond.