Physical Address
304 North Cardinal St.
Dorchester Center, MA 02124
Physical Address
304 North Cardinal St.
Dorchester Center, MA 02124
Tech News, Advice and Tutorials
Tech News, Advice and Tutorials

According to the Google Transparency Report, Google Chrome users spend over 90% of their browsing time on HTTPS pages. This means that users are more likely to leave a website if they find it to be insecure. While this in itself is a great reason to get an SSL certificate for your site, there are other reasons too. In fact, in 2018, Google announced that websites switching from HTTP to HTTPS (or Secure HTTP) shall enjoy a higher ranking on their search results. Apart from higher SEO ranking, SSL-certified websites also provide a more secure browsing experience and can boost customer experience.
If your website is still marked as “Not Secure” or denoted by “HTTP”, then it’s the right time to make the switch. In this article, we shall discuss the benefits of moving your website from HTTP to HTTPS, and show you can do this. But first, let’s start with the basics.
Take a look at any website URL in your browser. It is preceded by the “HTTP” or “HTTPS” denotation. HTTP or Hypertext Transfer Protocol is the standard system of transmitting data across the Internet. HTTPS or “Secure HTTP” is a protocol used to secure any transaction happening between the browser and the webserver. In simple terms, consider HTTPS as additional protection for your website against hackers.
As you know, many users submit their details or even financial data when interacting with websites – in the form of payment information or personal data. When a user enters any information on a browser, it is then transmitted to the website server. Hackers try to intercept this information during transmission using a hacking method called “Man in the Middle” (or MinM) attack.
This is where HTTPS plays a crucial role. It secures this transmitted information by:
HTTPS ensures that even if hackers manage to intercept the transmitted data, they won’t be able to read and exploit the information.
Next, what are the benefits of switching your website from HTTP to HTTPS?
Here are three ways by which websites can benefit by switching to HTTPS:
As mentioned earlier, HTTPS can secure your website and prevent cyberattacks like MitM that exploit insecure transactions. By preventing any external tampering, HTTPS ensures safe transactions for your site visitors.
In particular, this is important for online payments in eCommerce stores where shoppers have to submit their personal and financial information. Secure online transactions are vital to ensure data protection and to comply with GDPR legislation for your website.
According to Customer Think, 21% of online eCommerce customers do not make a transaction due to security concerns. Since 2018, every non-HTTPS website is marked as “Not Secure” by Google. This can affect customers who may be reluctant to engage with the website.
Safety indicators such as the security padlock symbol in HTTPS sites improve customer trust and brand loyalty. This can, in turn, improve customer conversion and online revenues.
As mentioned before, Google gives a higher ranking to HTTPS sites on their search results. According to MozCast, 50.3% of Google search results now feature websites that use HTTPS. This can, in turn, trigger an increase in incoming traffic to your website.
What’s more? Google preserves any referral information when directing traffic to your secure website. Thanks to its assured security, customers engage more with HTTPS sites as compared to websites marked as “Not Secure.” Higher engagement can reduce bounce rates, which in turn, further improves your site’s SEO ranking.
How can you switch your website from HTTP to HTTPS? Let’s find out.
To switch your WordPress website from HTTP to HTTPS all you have to do is install an SSL certificate. Short for Secure Socket Layer, SSL certification is what moves your site to HTTPS.
Most of the popular web hosts like Bluehost, Hostinger, and InterServer can provide you with this certificate. Alternatively, you can obtain free or paid SSL certificates from other vendors.
Which is better – free or paid SSL certificates? Let’s first understand the differences and then learn how to install either of them.
Free SSL certificates
You can obtain a free SSL certificate by installing tools like Let’s Encrypt or StartSSL. They are fast, user-friendly, and are ideal for websites that do not conduct many online payments and other transactions.
Free SSL offers a single domain validation (or DV), which means that it secures only a single web domain or address. Let’s Encrypt offers wildcard SSL certificates that cover the primary domain along with affiliated domains with a single certificate.
Free SSL providers also offer their certificates for a limited period – typically, 90 days – before they need to be renewed. While Let’s Encrypt certificate is valid for 90 days, SmartSSL offers its certificate for three years.
One of the flip sides of having a free tool is the absence of any customer support. In short, there is no customer servicing agent or chatbot to speak to – if you have any queries.
Paid SSL Certificates
On the other hand, you can obtain a paid SSL certificate from companies like Comodo or DigiCert. When compared to free certificates, paid SSL certificates offer better security and protection. Paid certificates are recommended for websites like eCommerce sites that have a high number of online transactions.
In addition to the standard domain validation, paid certificates also offer organizational validation – to validate the entire organization. This displays a site seal with the name of the organization. This works as a trust indicator that shows the business is legitimate and assures that the information shared remains confidential. Additionally, these certificates can cover multiple domains and even subdomains.
Paid SSL certificates are also valid up to two years before they need to be renewed. When it comes to the downside, paid SSL certificates are not very user-friendly and may require customer support to help install and configure them for your website. The good part is that paid SSL providers offer 24/7 customer support around the year.
Paid SSL certificates can also be expensive, depending on the type of security that your website requires. Additionally, they are harder to obtain as the vendor has to validate your business before issuing the certificate.
Now that you know the pros and cons of both free and paid versions, let’s look at how to install them on your website.
You can install a free SSL certificate on your WordPress site either through your web hosting company or by using the Cloudflare tool.
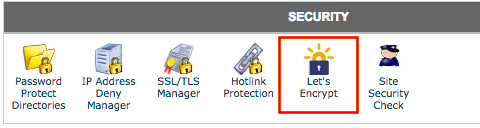
Popular web hosts like Bluehost, Siteground, and Kinsta include the free Let’s Encrypt tool in all their plans. Let’s first see how to install free SSL on each of these platforms:
What do you do if your web hosting company does not provide a free SSL certificate? In that case, you can use the Cloudflare tool to install the certificate as follows:
Similar to free SSL certificates, you can install a paid SSL certificate from your web hosting company or external SSL vendors.
Popular web hosts like Bluehost, Siteground, and Kinsta offer both free and paid SSL certificates. Both Bluehost and Siteground provide you with a free certificate – that you can later upgrade to a paid certificate. If you are using any other web hosts, it’s advisable to get in touch with their customer support to know how to install the paid certificate.
Once you have installed the SSL certificate, the next step is to activate the SSL plugin and move your entire website, including your web pages to HTTPS.
HTTPS or SSL certification secures your website and is also useful in attracting more visitors to your site. Apart from SSL certification, you can further improve your website security by installing a security plugin like MalCare. The tool provides malware scanning and removal through an easy one-click process. Other features like an in-built firewall and hardening measures can further safeguard your website. We highly recommend that you make these two measures a part of your WordPress maintenance strategy.
Have you moved your website to HTTPS? If yes, then how has it made a difference? Do share your thoughts and comments below.